
If you enjoy PC building, gaming, or creating media, you want the fastest SSD storage. Today, it is more common for consumers to purchase laptops with NVMe drives. This post will explore how NVMe drives are superior to other storage options and how to install M.2.
What are NVMe Drives?
NVMe stands for ‘Nonvolatile Memory Express.’ It’s the next-generation solid-state drive (SSD). Kingston states, “It communicates between the storage interface and the System CPU using high-speed PCIe…”
After rebooting, the NVMe’s flash memory storage data isn’t erased. Also, it’s much faster than hard disk drives (HDD) because the data travels the Peripheral Component Interconnect Express (PCIe) bus. For instance, it directly connects the SSD to your PC’s motherboard.
The older HDDs are limited because the data hops through a Serial Advance Technology Attachment (SATA) controller. Yet, SSDs with SATA resemble older 2.5” laptop drives, and their speeds are limited too.
A single 4th-Gen PCIe lane can transfer up to 2 GB/s data. The previous PCIe 3.0 data transfer speed is 1 GB/s per lane. In comparison, SATA only has one, which can transfer up to 600 MB/s.
Most M.2 NVMe SSDs use the x4 connection, meaning a PCIe 3.0 can transfer up to 4 GB/s of data. The PCIe-using SSD is substantially much faster than SATA SSD.
Also, you can learn more about other computer storage options and their benefits in this post.

How to Install an M.2 NVMe
Before purchasing an M.2 NVMe, check that your motherboard supports it. M.2 drives have keys that prevent them from plugging into incompatible sockets. So, you should carefully verify which type you need in your motherboard’s manual.
For safety, turn off your PC entirely before opening your case. Then discharge the residual power by holding the power button for 5 seconds. Next, touch an unpainted metal surface to ground yourself. Doing this protects your PC’s components from damage by static electricity.
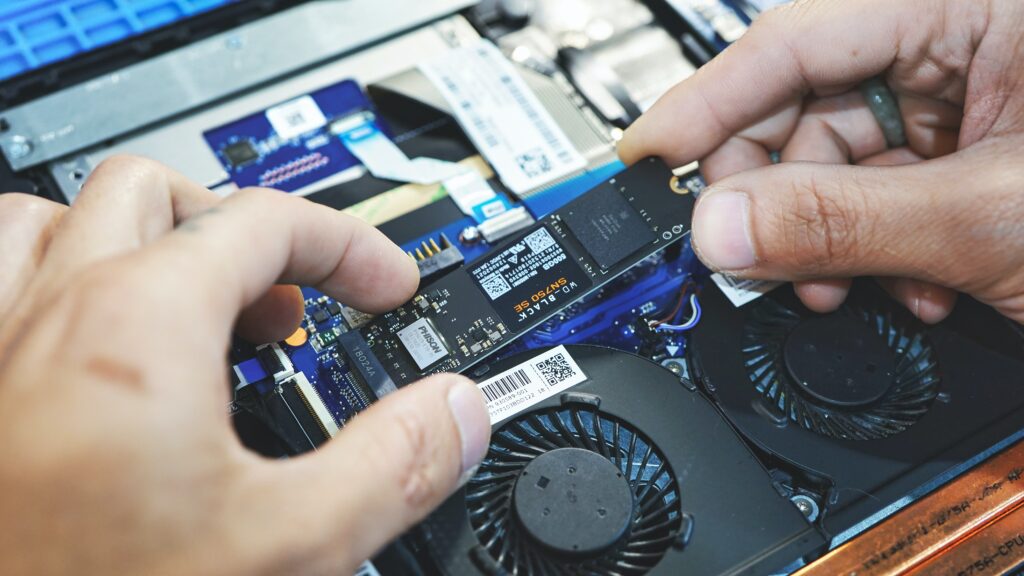
Sometimes, you might have to remove a heat sink or screw before inserting the PCIe SSD. The safest way to approach this is to hold the SSD carefully by the sides. And do not touch the gold connector pins. Then, you’ll add the NVMe M.2 diagonally into a slot.
Next, align the notches in the M.2 with the ridges in the PCIe slot, then insert at a 30-degree angle. Be careful not to force it.

To finish, you push the SSD down, flush on the standoff mount screw and secure it.
If your motherboard came with a heatsink, peel off the protective tape. And you’ll want to press the heatsink down on top of the M.2 firmly, then screw it in place.
Format Your New Drive
Now you format your new NVMe SSD. There are two easy ways to create a Windows 11 bootable USB.
First, download and launch the Media Creation Tool. Next, Select the ‘USB flash drive’ option and continue with the on-screen prompts.
If the M.2 is your secondary drive, you can use the Disk Management option to allocate space and format it. Just right-click the new drive and select New Simple Volume. Next, follow the Windows steps.
Another option is to use the Rufus tool to create a bootable USB with Windows 11. You can download the latest version of Rufus from the official website.
Also, remember to access the BIOS setup and ensure to set your M.2 device for the boot sequence.
In brief, the M.2 SSD is one of the fastest and most stable storage options today! Just enjoy your PC building and experience a remarkable boost in performance.